| |||
|
As many of you know (from previous emails), I
completed my first custom framing back in December.
Now, I've completed my second project -- a much more complex,
three-dimensional, solid-oak framing composition:
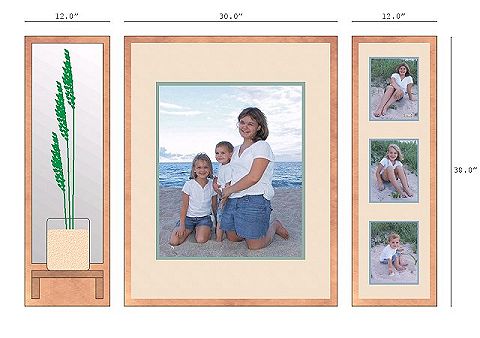
Here is the original concept rendered
on the computer...
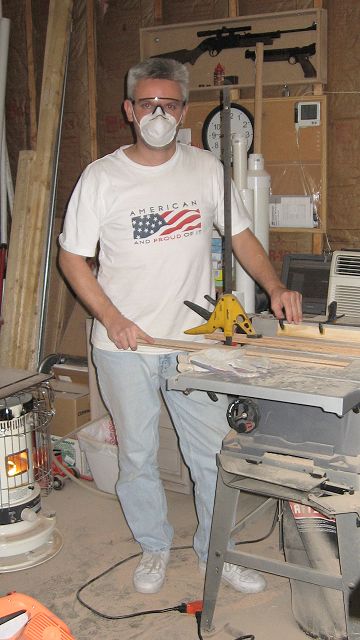
 Gary cutting the first frames and Dados on the table
saw...
 Close-up of the Dado jig on the table saw (they
came out PERFECTLY)...
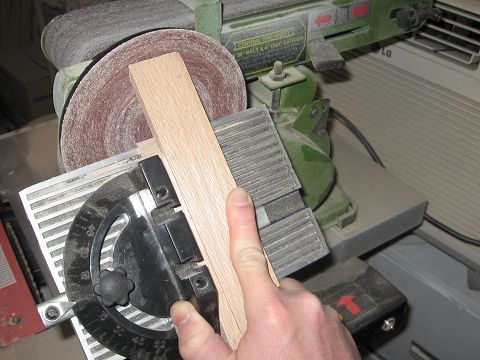
 And, here's the trick to absolutely perfect miter
joints -- mitered sanding...
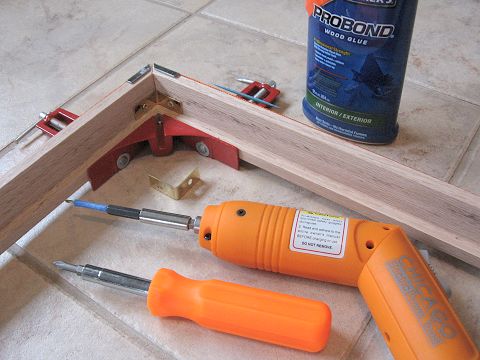
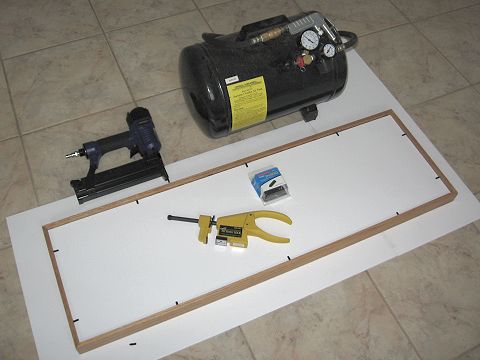
 Gluing and joining the frames (with brackets) in the
miter-jigs and framing bands...
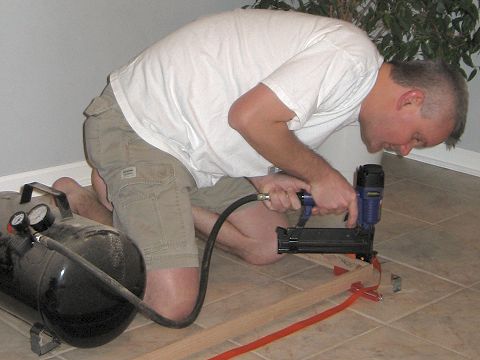
 Further reinforcing the mitered-corners with
18-gauge staples...
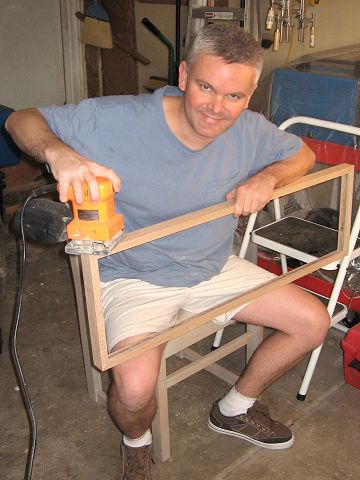
 Preparing one of the frames with fine finishing
sanding...
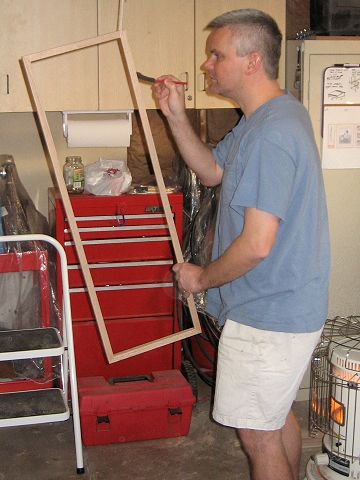
 Finishing one of the smaller frames with Tung
Oil...
 A comparison photo of an oil-finished frame
and a raw oak frame...
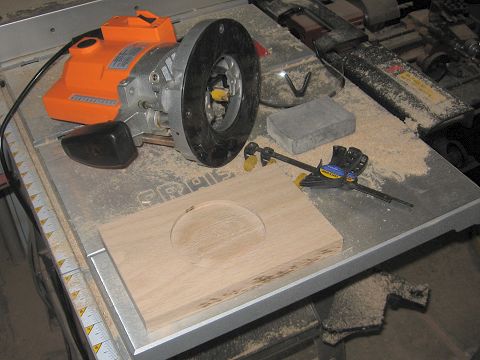
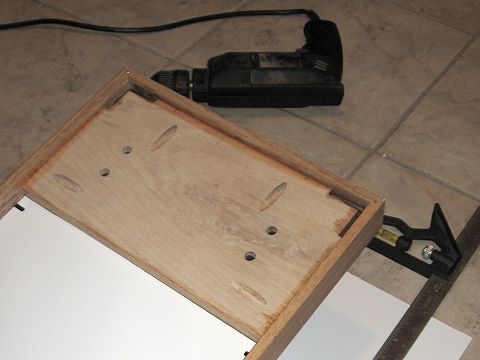
 Routering a trough in the shelf (of the mirrored
frame) for the glass vase...
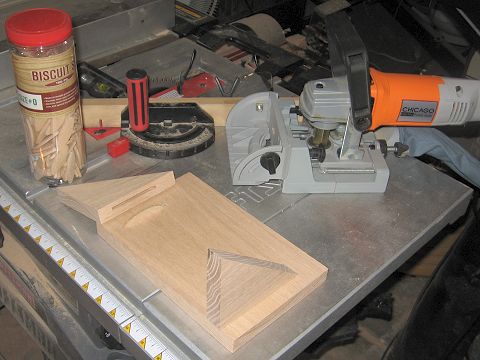
 Biscuit joinery of the shelf (for support
of the vase, sand and greenery)...
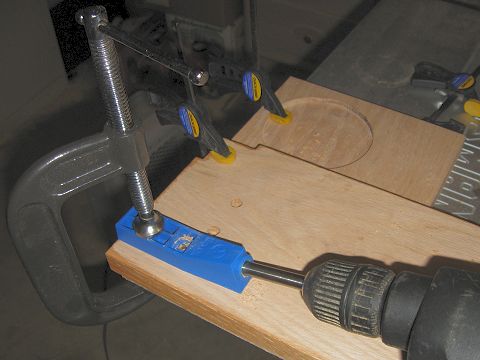
 Drilling the pocket-screws for the
shelf...
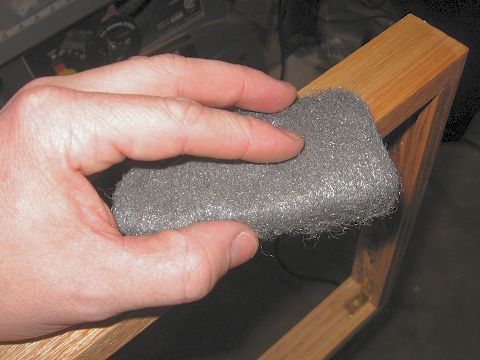
 Buffing the finish to a satin sheen with
#00 Steel Wool...
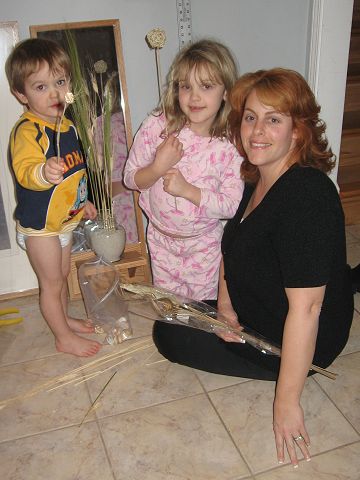
 Lisa and the kids arranging the sand,
shells and "sea oats" in the vase...
 After cutting matt-board, securing the photos with
foam-board and framing inserts...
 A close-up of how the frame with mirror and shelf
(with pocket-screws) is mounted...
 The final end result (note: I still haven't removed
the protective cover on the glass)...
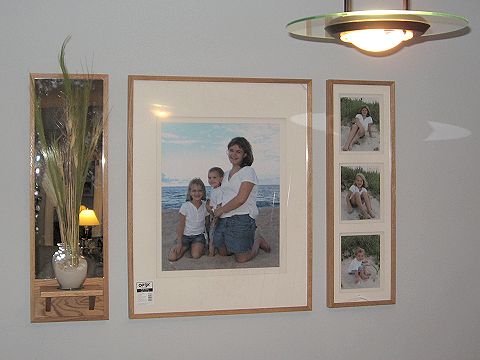 It looks MUCH BETTER in person and in natural
lighting, but you get the ideas from these pictures. I'm VERY satisfied
with the results... now I'm on to my next custom carpentry project. Stay
tuned...
--
Gary Brown
| |||
|
|